One of the benefits of having the source code is that often the comments in the code can provide good insight into the inner workings that the normal documentation does not. It can also show code that will output more logging when certain options are set.
The biggest benefit comes from being able to attach a debugger to the PostgreSQL processes and step through the code. This blog details how to build PostgreSQL 12 from the source code on Windows 10 64bit.
Let’s get the environment ready.
Downloading the Source Code
The source code is held in a GIT repository hosted on a PostgreSQL server. Getting the source code is much easier using a GIT windows or command line client. I am using TortoiseGIT.
The repository is hosted at https://git.postgresql.org/gitweb/?p=postgresql.git;a=summary and specifically I want the latest stable v12 release which at the time of writing was tagged at REL_12_0.
We will do a GIT clone using the URL git://git.postgresql.org/git/postgresql.git and specifying the tag REL_12_0. Create a folder called C:\PostgreSQL12_Source. Right click and select Git Clone. Fill out the UI as below and click OK.

We can verify the actual version by checking the contents of the file C:\PostgreSQL12_Source\src\interfaces\libpq\libpq.rc.in

This confirms the version of PostgreSQL we are using.
Install C++ Feature in Visual Studio 2019
I am using Enterprise edition of Visual Studio. If you find anything missing from yours, it could be your edition does not support it.

From Visual Studio click on Tools -> Get Tools and Features. From the Workloads tab locate the Desktop development with C++. If there is not a blue tick in the top right hand corner, click it.

On the right hand side locate the list of options. You can see what I have selected which is fine for compiling this project.

Installing Build Dependencies
The build process needs two tools called Bison and Flex. The best way to get these is to install msys2 which provides all the GNU tools on windows. It comes with an MSYS2 and MINGW64 Linux terminals.
Navigate to https://www.msys2.org/ and select the installer highlighted below. This will launch the familiar install dialog. I installed mine in C:\Apps\msys64.

Once completed open the msys2 console by running C:\Apps\msys64\msys2.exe.
The first step is to update the current build with the latest packages. Enter pacman –Syuu and answer Y to any questions.

When it completes the first part, it tells us to close the window so just click the X button in the right hand corner.

Open msys2 console again and rerun pacman –Syuu. This time the command continues and completes successfully.
We now need to install some tools that will be used when running our build process further down.
Run Pacman –S mingw-w64-x86_64-toolchain bison flex
It produces allot of messages which should now be familiar based on running pacman above so I will not show any. If you want to see a list of all the packages installed run pacman –Q.
Next we need to install Perl which needs to be compatible with the PostgreSQL build. We cannot use the one that is pulled using pacman, so a good free alternative is Strawberry Perl.
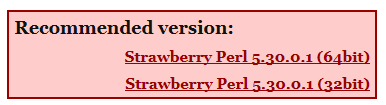
Go ahead and select the 64bit version. I installed mine in C:\Apps\StrawberryPerl.
That is all the dependencies we need.
Generate Visual Studio Project and Solution Files
Out of the box there are no project or solution files however; the creators of this source provided build files to create them.
Launch the Developer Command Prompt for VS 2019. Make sure you select the Native x64 version [x64 Native Tools Command Prompt for VS 2019]. This will setup the correct paths to the build tools.

By default the path to the binaries for Perl and Msys2 are not in the default PATH. I don’t like littering my path with everything.
Set the path using SET PATH=%PATH%;C:\Apps\StrawberryPerl\perl\bin;C:\Apps\msys64\usr\bin

Make sure the following tools can be found. where perl bison flex nmake.
Make sure Strawberry Perl is found first and not one from msys64 if it exists. Your build will fail if you use the wrong one. If any are missing go back to the dependency section above.

Navigate to C:\PostgreSQL12_Source\src\tools\msvc. This is the folder that contains the files for generating the project and solution files.
Enter build to build Release and Debug or build
DEBUG
for just the debug build. This will take 5 mins or so, so go and have a cup of tea. The main reason for running this is to create the project and solution files. All future builds will be done from Visual Studio.

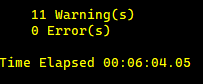
You will get a ton of messages. Hopefully build will end with zero errors as shown below. Any errors will be shown in red. Make sure you scroll back because some errors may appear earlier.
When completed you should see the following messages. Ignore the warnings.
Open the Solution in Visual Studio
Once the build has completed the solution and project files will be in C:\PostgreSQL12_Source.
In order to build from Visual Studio we need the same PATH setup as above. I ran the following from the command prompt.
SET PATH=%PATH%;C:\Apps\StrawberryPerl\perl\bin;C:\Apps\msys64\usr\bin
"C:\Program Files (x86)\Microsoft Visual Studio\2019\Enterprise\Common7\IDE\devenv.exe"
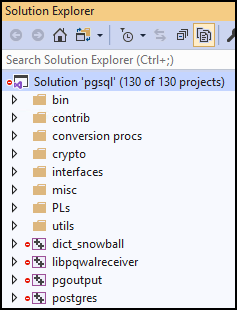
Open the solution C:\PostgreSQL12_Source\pgsql.sln. If all has gone well you should see the following.
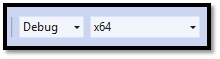
Make sure we have the correct platform selected.
Go ahead and run Rebuild Solution and monitor the build in the Output window. This will create the folder C:\PostgreSQL12_Source\Debug.

As you can see the build has succeeded.

Having this solution available enables us to attach to a running PostgreSQL process and step through the code. Sweet.
Build a Release
The last thing we need to do is build a release. We can then use this to create a PostgreSQL database and start a cluster.
Make sure you are in the C:\PostgreSQL12_Source\src\tools\msvc folder. Then run install C:\PostgreSQL12. This will look for the release folder C:\PostgreSQL12_Source\Release. If that does not exist it will look for the debug folder C:\PostgreSQL12_Source\Debug. The output will be written to C:\PostgreSQL12.

When completed successfully you are ready to run PostgreSQL from C:\PostgreSQL12 and perform process debugging from Visual Studio.
