In this last blog I showed how to create a container with more options and then how we can connect to it from outside using sqlcmd and SQL Server Management Studio.
In this blog I will explain how we can use volumes to persist our database data.
Persisting Database Data
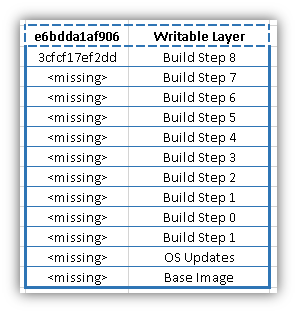
When a container is created from an image it consists of all the layers from the image which are read-only and one writable layer when the container is created. All writes to the container are persisted in this layer until the container is deleted and the writes are lost.
Looking at the history of the image, we can draw a chart of what it looks like.
docker history -q microsoft/mssql-server-windows-developer:1709
When you think about a SQL Server installation, the software and logs are written to the C drive and one or more other drives or volume mountpoints are created to persist the database data. Docker has the concept of Volumes to separate our data from our container and will persist even if the container is deleted.
Docker Volumes
When we create a container one of the options is to add one or more volumes. Using the –v switch we can add two parameters separated by a colon. We have two different options.
- -v :
- -v :
If we go back to Part 1 of this blog I showed how we can change the docker configuration so that all images and containers can be located on T:\DockerImages rather than the C Drive. Let’s create a volume.
docker volume create DemoData
docker volume inspect DemoData

Notice the location of the volume. The big problem with docker volume is that you cannot give a location during the creation. The location is fixed for all docker volumes which is not ideal when you require specific volume placement.
The more flexible approach is to create a folder as required and just reference the folder itself. Let’s do that.
For our demo I created T:\DockerVolumeLocation\Demo.
Create a Container with a Volume
At the time of writing I am using docker version 17.12.0-ce-win47 (15139), you can view the release notes here. There is no way of adding a volume to an existing container so we need to create a new one. Ill show you a couple of techniques in the next blog for allowing volume changes without losing data. Let’s delete the current Demo container.
docker stop Demo
docker container rm Demo
docker create –name Demo -v T:\DockerVolumeLocation\Demo:C:\VolumeData –network Hyper-V-External-Network –hostname demohost -p 1433:1433 –cpu-count 2 –memory 4g -e sa_password=Password1#### -e ACCEPT_EULA=Y microsoft/mssql-server-windows-developer:1709
docker start Demo
Now we have a running container let’s check the folder inside the container. If you notice the docker create above, there should be a folder inside the container called C:\VolumeData which maps to the T drive on the container host.
docker exec –it Demo cmd
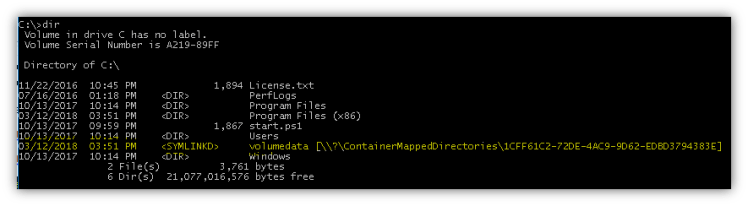

A point worth noting which can trip people up is that a container is not a virtual machine. Resource isolation is done by the host container operating system. This is why you see a kernel mapped link to the folders.
Create a Database on the Volume
One configuration change you probably may want to do is change the default location of the Data and Log files when creating a database. From SSMS we can point the data and log locations at the volume folder.
EXEC xp_instance_regwrite N’HKEY_LOCAL_MACHINE’, N’Software\Microsoft\MSSQLServer\MSSQLServer’, N’DefaultData’, REG_SZ, N’C:\volumedata\Data’
EXEC xp_instance_regwrite N’HKEY_LOCAL_MACHINE’, N’Software\Microsoft\MSSQLServer\MSSQLServer’, N’DefaultLog’, REG_SZ, N’C:\volumedata\Log’
EXEC xp_instance_regread N’HKEY_LOCAL_MACHINE’, N’Software\Microsoft\MSSQLServer\MSSQLServer’, N’DefaultData’
EXEC xp_instance_regread N’HKEY_LOCAL_MACHINE’, N’Software\Microsoft\MSSQLServer\MSSQLServer’, N’Defaultlog’
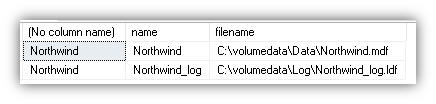
I have a script used to create the Northwind database.
SELECT DB_NAME(dbid),name,filename FROM sys.sysaltfiles
Let’s look on the container host in T:\DockerVolumeLocation\Demo.
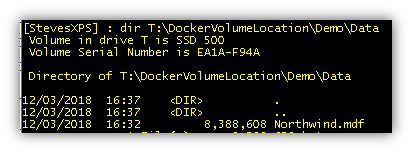
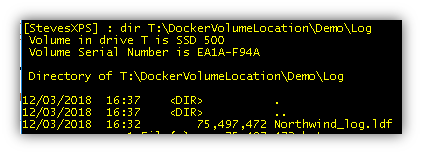
If we delete the container, the files in T:\DockerVolumeLocation\Demo will remain.
docker stop Demo
docker container rm Demo

We can the build a new container and run sp_attach_db to bring the database back in. Note: The system databases do not reside on the volume we created so anything added will be missing.
In the next blog I will explain how to create an image with the latest cumulative update.
