When creating a Linux VM in Azure we have two options for configuring authentication:
- Regular username and password
- Using an SSH public key
Username and password need no introduction. The purpose of this blog is to show how we can access the VM using SSH which eliminates the need for entering a password for logging in.
Overview of SSH
SSH uses two keys:
- A public key which can be shared with anyone and in our case is the one we send to the Linux VM.
- A private key which we must NOT share with anyone and is used by our client in order to connect to the VM.
The private key is so sacred that we should also secure it using a passphrase however; this is optional. I will show you using a private key with and without a passphrase.
Generating our SSH Keys
Before we generate our SSH keys it’s important to know what encryption protocols are supported by the VMs in Azure. At the time of writing Azure supports SSH-2 RSA public-private key pairs with a minimum length of 2048 bits. In order to generate our keys we will download some Putty tools. Go to the Putty download page here and download the following three apps into a folder of your choice:
- putty.exe (PuTTY Configuration)
- puttygen.exe (PuTTY Key Generator)
- pageant.exe (PuTTY Authentication Agent)
Launch puttygen.exe and the following screen will appear.
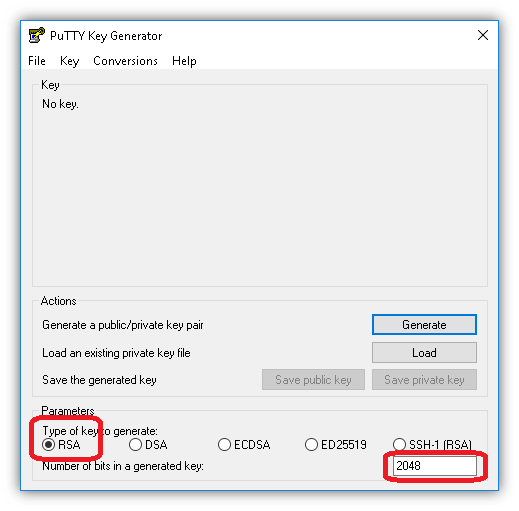
Make sure RSA is selected and the length is 2048. This is the only type Azure supports.
Next click Generate and as requested, keep dragging your mouse over the blank area below the green progress bar. Once completed your screen will look like this. Note: The Key will look different every time it is run.
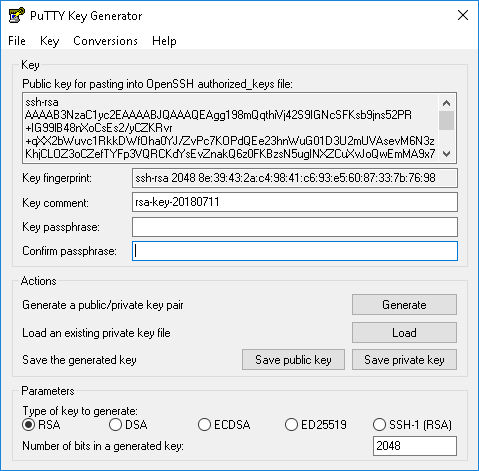
At this stage we will not include a Key passphrase. We will add that later. Click Save private key, ignore the warning. Create the file PrivateKey.ppk in a folder of your choice. You can optionally save the public key to a file however; for this demonstration I will just copy the Public key to the clipboard.

Adding the SSH Public Key to your Azure VM
From Azure open your Linux VM blade and select Reset Password under Support + Troubleshooting. Select Reset SSH Public Key and enter your Username and paste the SSH Public key you copied previously. Click Update to add this key.

Testing Connectivity from PuTTY
Launch putty.exe and the following screen will appear.

Enter the hostname or IP address of your Linux VM. (From Azure locate the VMs public IP or hostname from the overview blade). Click Open.

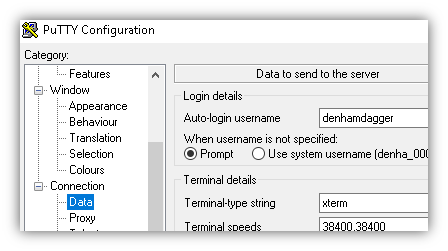
Notice I am getting prompted for a username and password. Cancel this and launch putty again. Enter the hostname or IP address of your Linux VM and this time under the Category pane on the left select Connection -> Data. In Auto-login username enter your username to connect with.
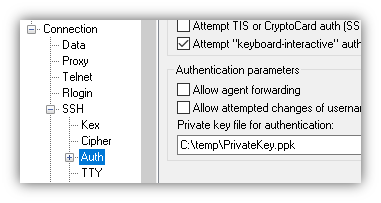
Then select Connection -> SSH -> Auth. Select the private key file you saved using puttygen.
Click Open at the bottom to connect to your VM. If all goes well you should log straight in without being prompted.
Securing the Private Key with a Passphrase
I mentioned above that a private key should be secured with a passphrase, why? Well if someone manages to get hold of your private key, they can access your resources. If it is secured with a passphrase, when they go to use it, it will prompt them for the passphrase first.
Launch puttygen.exe again. This time click on the Load button and select your private key file. Enter your passphrase as indicated below.
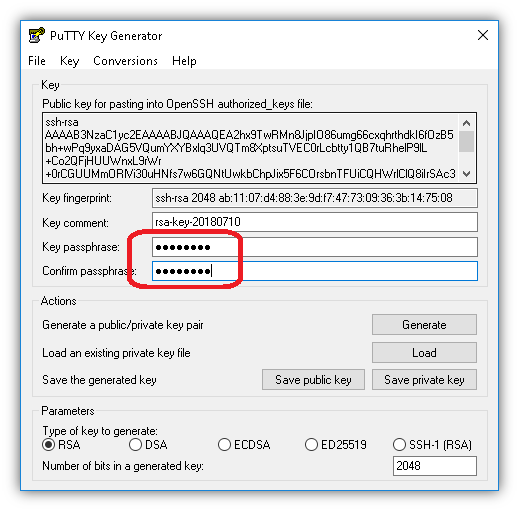
Click Save private key to save your key. Notice the warning prompt did not appear.
Testing Connectivity from PuTTY with a Passphrase
Using putty.exe repeat the connectivity steps above and click Open again.
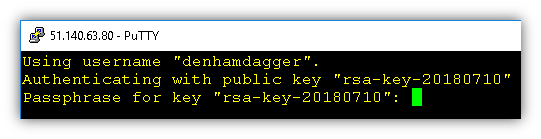
Notice this time you are prompted for the passphrase. Enter your passphrase and you should connect successfully.

Hold on a minute you might be saying. If I have to enter a passphrase each time, I might as well enter a password. Go to the next section and I’ll solve that issue.
Prevent Passphrase Prompt When Connecting
We don’t want to have to enter a passphrase every time we connect. Remember a passphrase is our protection in case someone gets hold of our private key.
Remember above I had you download three apps. Launch pageant.exe, the PuTTY Authentication Agent. The agent sits in the system tray with the icon 
Right click and select Add Key. Select your private key file and a window will pop up asking you to enter your passphrase.

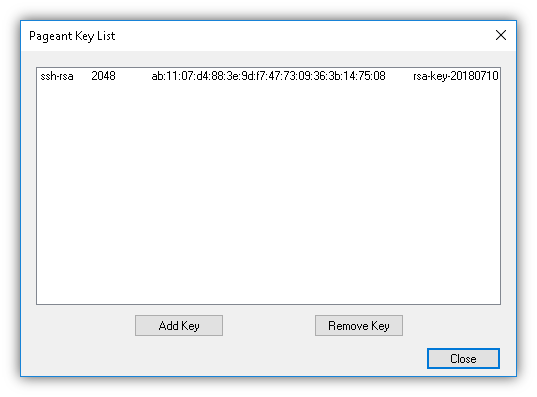
Enter your passphrase and click OK. Right click and select View Keys. The key list windows will appear where you can manage the list.
Using putty.exe repeat the connectivity steps above and click Open again.

If all goes well you will log straight in. Note: The moment you close the PuTTY Authentication Agent, you will be prompted for the passphrase again.

One thought on “Accessing a Azure Linux VM using SSH on Windows”
Comments are closed.