This is a series of blogs detailing my introduction to using OData v4 with C# and ASP.NET WebApi.
The source code for the project can be found here.
In the last blog we created a customer entity set with a single key. In this blog I will create a composite key on an entity.
Creating the Project
The Project is called Part09
Create the Car Model
In the Models folder create a Car class for our Entity.
public class Car
{
   [Key]
   public string Make { get; set; }

   [Key]
   public string Model { get; set; }

   public string Colour { get; set; }
   public double Price { get; set; }
}
Here we have added the Key attribute to the Make and Model properties.
Create a Data Source
A folder called DataSource was created and within it a class called Repository.
Two methods were created. One to fetch all the cars and the other to fetch a specific make and model.
public IQueryable GetCars()
{
   return _cars.AsQueryable();
}

public Car GetCar(string make, string model)
{
   return _cars.Where(p => p.Make == make && p.Model == model).FirstOrDefault();
}
Create the Entity Data Model (EDM)
We need to describe our Car in the OData Entity Data Model. There is in fact a number of different ways we can do this however; that will be for a future blog. For this demo, I will use the most simplistic way to keep things simple.
Within the App_Start\WebApiConfig.cs file I created a GetEdmModel method to define our EDM.
private static IEdmModel GetEdmModel()
{
   ODataConventionModelBuilder _builder = new ODataConventionModelBuilder();
   _builder.EntitySet("Cars");
   return _builder.GetEdmModel();
}
We declare a new model, add an EntitySet called “Cars” based on our Car type or Entity in this context. The EDM is then generated and returned from this method. It uses the Key attributes on the Car class to determine the key for the car entity.
Create Cars Controller
The EDM we created above declared an EntitySet called Cars. This means we must create a controller called CarsController. Within the controller we need to support two actions, one to fetch all the cars and the other to fetch a car by make and model.
public class CarsController : ODataController
{
   private Repository _repo;

   public CarsController()
   {
      _repo = new Repository();
   }

   // OData/Cars
   public IQueryable Get()
   {
      return _repo.GetCars();
   }

   // OData/Cars(Make='Vauxhall', Model='Zafira')
   public Car Get([FromODataUri] string KeyMake, [FromODataUri] string KeyModel)
   {
      return _repo.GetCar(KeyMake, KeyModel);
   }
}
Look at the method signature public Car Get([FromODataUri] string KeyMake, [FromODataUri] string KeyModel)
Sometime in 2016, the Microsoft.OData.Core library was changed to allow actions to recognise composite keys base on the method argument names. Prior to that change you would have to decorate actions with an ODataRoute attribute.
The car class has two members called Make and Model. The action signature must put the word Key in front of each argument name in order for the routing to locate the correct action automatically.
Create an OData Route
The last piece of configuration is defining the route much like we define the routes for WebApi, ASP.NET MVC, etc. The route maps a request to a specific controller name and action name. Any routes we define for OData will replace any WebApi routes that may also exist.
Within the App_Start\WebApiConfig.cs file there is already a Register method with the default WebApi route registration. We can delete the WebApi config if it is not required and just add the OData route.
public static void Register(HttpConfiguration config)
{
   // OData Routing
   config.MapODataServiceRoute("OData", "OData", GetEdmModel());
}
Query all Cars
We are finished with the coding and can now test.
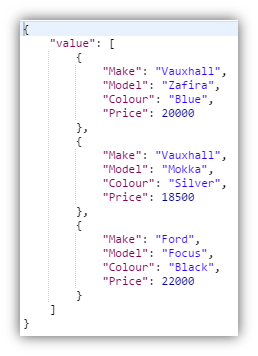
From Postman issue a GET request with http://localhost:40000/Cars to fetch all the cars.
Query One Car
From Postman issue a GET request with http://localhost:40000/OData/Cars(Make = ‘Vauxhall’, Model = ‘Zafira’) to fetch a single car.
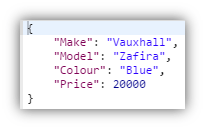
Here we specify the property names with the string values in single quotes.
In the next blog we will continue our basic queries by looking at using the routing attributes.
